
Effortless Acoustic Fingerstyle: Your Step-by-Step Guide to Love Songs
Want to serenade someone special with a beautiful acoustic love song, played with the intricate and captivating style of fingerpicking? You’re in the right place! This comprehensive step by step acoustic love song fingerstyle tutorial will take you from basic chords and strumming to creating stunning arrangements that will move hearts. We’ll break down complex techniques into easy-to-follow steps, ensuring that even beginners can learn to play romantic melodies with confidence and grace. This guide offers a unique blend of theoretical knowledge, practical exercises, and song examples, providing a holistic learning experience. Whether you dream of playing at weddings, impressing your loved one, or simply enjoying the beauty of fingerstyle guitar, this tutorial is your roadmap to success.
Unveiling the Magic: What is Acoustic Fingerstyle for Love Songs?
Acoustic fingerstyle is a technique where you pluck the strings of the guitar directly with your fingers, rather than using a pick. This allows for greater control over individual notes, creating intricate melodies, harmonies, and rhythmic patterns simultaneously. When applied to love songs, fingerstyle guitar adds a layer of intimacy and expressiveness that is unmatched. It’s about creating a personal connection with the music, allowing the listener to feel the emotion behind each note.
Unlike strumming, which provides a rhythmic foundation, fingerstyle allows you to weave multiple musical lines together. You can play the bass line with your thumb, the melody with your index and middle fingers, and add harmonic embellishments with your ring and pinky fingers. This creates a rich and layered sound that is both captivating and emotionally resonant. The beauty of step by step acoustic love song fingerstyle tutorial is that you build this sound gradually, mastering each element before combining them.
The evolution of fingerstyle guitar has been influenced by various genres, including blues, folk, and classical music. Legendary guitarists like Chet Atkins, Merle Travis, and Tommy Emmanuel have pushed the boundaries of the technique, inspiring countless musicians to explore its possibilities. In the context of love songs, fingerstyle allows you to transform simple chord progressions into deeply personal and expressive musical statements.
Essential Gear & Guitar Setup for Fingerstyle Success
While the skill of fingerstyle playing is paramount, having the right gear can significantly enhance your learning experience and the quality of your sound. Let’s explore the essential equipment and guitar setup considerations for mastering this technique.
The Acoustic Guitar: The foundation of your fingerstyle journey is, of course, your acoustic guitar. While any acoustic guitar can technically be used, certain characteristics make some guitars better suited for fingerstyle playing. Guitars with wider string spacing at the nut and saddle allow for more comfortable finger placement and reduce the chances of accidentally muting adjacent strings. Solid-top guitars, known for their enhanced resonance and sustain, are highly recommended for achieving a richer and more expressive tone. Common tonewoods like spruce, mahogany, and cedar each offer unique sonic qualities, so experiment to find what resonates best with your personal preferences.
Strings: The choice of strings plays a crucial role in shaping your fingerstyle sound. Lighter gauge strings (e.g., .011-.052) are generally preferred for fingerstyle playing as they require less finger pressure, making it easier to execute intricate patterns and bends. Phosphor bronze strings offer a warm and balanced tone, while 80/20 bronze strings provide a brighter and more articulate sound. Experiment with different string types and gauges to discover the optimal combination for your guitar and playing style.
Nail Care: For many fingerstyle guitarists, the nails on their picking hand are an integral part of their sound. Properly shaped and maintained nails can produce a clearer, more articulate tone with increased volume and projection. The ideal nail length and shape vary from person to person, so it’s essential to experiment to find what works best for your hand and playing style. Some guitarists use artificial nails or nail enhancements to achieve their desired sound.
Breaking Down the Basics: A Step-by-Step Tutorial
This step by step acoustic love song fingerstyle tutorial is designed to take you from beginner to confident fingerstyle player. Each step builds upon the previous one, ensuring a solid foundation in technique and musicality.
Step 1: Mastering the Thumb-Index Pattern
The thumb-index pattern is the foundation of many fingerstyle arrangements. The thumb typically plays the bass notes on the lower strings (E, A, D), while the index finger plays the melody on the higher strings (G, B, e). Start by practicing simple exercises, alternating between the thumb and index finger. For example, play the open E string with your thumb, followed by the open B string with your index finger. Repeat this pattern, focusing on maintaining a consistent rhythm and tone. This exercise builds coordination and independence between your thumb and index finger.
Step 2: Introducing the Middle Finger
Once you’re comfortable with the thumb-index pattern, introduce the middle finger. The middle finger typically plays the melody on the G string. Practice exercises that incorporate all three fingers, such as thumb on E, index on B, and middle on G. Experiment with different combinations and rhythms to develop your dexterity and control. A common exercise is to play a simple chord progression (e.g., C-G-Am-F) using the thumb-index-middle pattern, assigning each finger to a specific string.
Step 3: Adding the Ring Finger
The ring finger is often used to add harmonic embellishments or to play additional melody notes. Incorporating the ring finger can be challenging at first, as it requires greater finger independence. Practice exercises that isolate the ring finger, such as playing a simple scale on the D string. Once you’re comfortable with the ring finger, try incorporating it into your existing patterns. For example, you could use the ring finger to play a passing tone between melody notes played by the index and middle fingers.
Step 4: Exploring Chord Voicings and Inversions
Fingerstyle arrangements often utilize different chord voicings and inversions to create a richer and more interesting sound. Experiment with different ways of playing common chords, such as C, G, Am, and F. Try using different fingerings and voicings to create different textures and colors. For example, you could play a C chord with the root on the 5th string (3rd fret) or with the root on the 6th string (8th fret). Inversions involve changing the bass note of the chord, which can create smoother transitions between chords.
Step 5: Incorporating Harmonics and Embellishments
Harmonics and embellishments can add a touch of magic to your fingerstyle arrangements. Harmonics are bell-like tones that are produced by lightly touching the string at specific points. Natural harmonics can be found at the 5th, 7th, and 12th frets. Artificial harmonics involve fretting a note with your left hand and then touching the string with your right hand. Embellishments include techniques such as hammer-ons, pull-offs, slides, and bends. These techniques can add expressiveness and character to your playing.
Selecting the Perfect Love Song for Fingerstyle Arrangement
Choosing the right song is crucial for a successful and enjoyable fingerstyle arrangement. Not all songs lend themselves equally well to fingerstyle adaptation. Here’s what to consider:
- Melodic Strength: A strong and memorable melody is essential. The melody should be easily recognizable and translate well to the guitar.
- Chord Progression: Simple and effective chord progressions are ideal. Avoid songs with overly complex or dissonant harmonies, as they can be difficult to arrange for fingerstyle.
- Emotional Resonance: Choose a song that resonates with you emotionally. Your passion for the song will translate into your playing and create a more compelling performance.
- Tempo and Rhythm: Consider the tempo and rhythm of the song. Slower tempos and simpler rhythms are generally easier to arrange for fingerstyle.
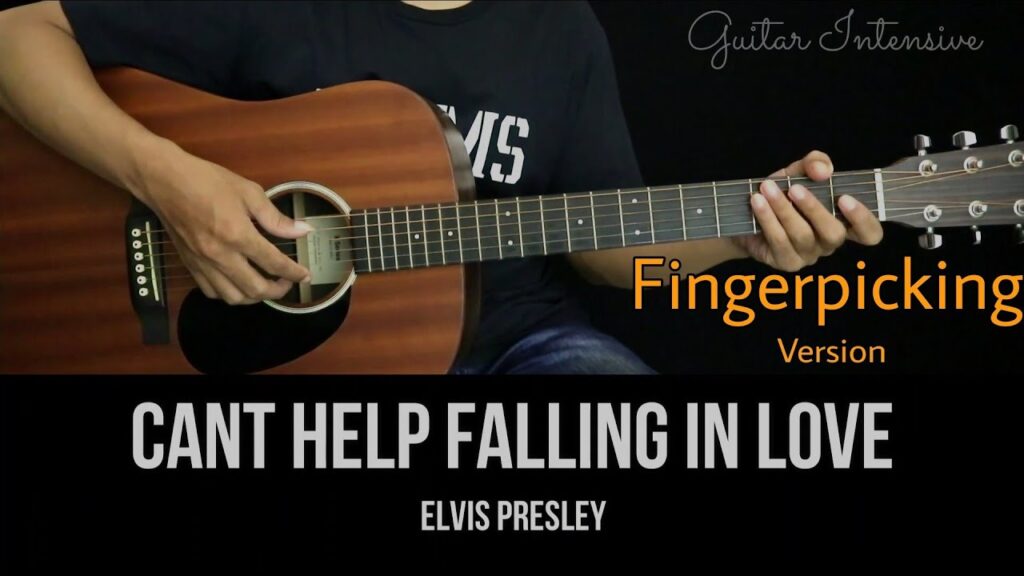
Some popular love songs that work well for fingerstyle arrangements include “Hallelujah” by Leonard Cohen, “Perfect” by Ed Sheeran, and “Can’t Help Falling in Love” by Elvis Presley. These songs have strong melodies, simple chord progressions, and emotional depth that make them ideal for fingerstyle adaptation.
Analyzing a Fingerstyle Love Song Arrangement: “Thinking Out Loud”
Let’s analyze a hypothetical fingerstyle arrangement of Ed Sheeran’s “Thinking Out Loud” to illustrate the key elements of a successful adaptation. This will show a practical application of step by step acoustic love song fingerstyle tutorial.
Original Song Structure: “Thinking Out Loud” features a simple chord progression (D-G-Em-C) and a memorable melody. The song’s tempo is moderate, and its rhythm is relatively straightforward.
Fingerstyle Adaptation: In a fingerstyle arrangement, the thumb would typically play the bass notes of the chords, while the index and middle fingers would play the melody. The ring finger could be used to add harmonic embellishments or to play additional melody notes. The arrangement would likely feature arpeggiated chords, where the notes of each chord are played individually rather than strummed. This creates a more delicate and intimate sound.
Specific Techniques: The arrangement might incorporate techniques such as hammer-ons, pull-offs, and slides to add expressiveness and character. Harmonics could be used to create bell-like tones and to highlight certain notes in the melody. The arrangement would also likely feature different chord voicings and inversions to create a richer and more interesting sound.
Emotional Impact: The goal of the fingerstyle arrangement would be to capture the emotional essence of the original song while adding a personal touch. The arrangement should be both technically impressive and emotionally resonant, creating a captivating and memorable listening experience.
Common Mistakes to Avoid in Fingerstyle Playing
Learning fingerstyle guitar can be challenging, and it’s common to encounter certain obstacles along the way. Here are some common mistakes to avoid:
- Tension: Excessive tension in your hands and arms can hinder your technique and lead to injury. Focus on relaxing your muscles and maintaining a loose grip on the guitar.
- Inconsistent Rhythm: Maintaining a consistent rhythm is crucial for creating a polished and professional sound. Practice with a metronome to develop your sense of timing.
- Poor Finger Independence: Developing finger independence is essential for playing complex fingerstyle patterns. Practice exercises that isolate each finger to improve your dexterity and control.
- Neglecting Nail Care: For those who use their nails, neglecting nail care can negatively impact your tone and playing. Keep your nails properly shaped and maintained to achieve the best possible sound.
- Lack of Patience: Learning fingerstyle guitar takes time and patience. Don’t get discouraged if you don’t see results immediately. Keep practicing consistently, and you will eventually reach your goals.
The Beauty of Fingerstyle: More Than Just Technique
Mastering the step by step acoustic love song fingerstyle tutorial is not just about learning the technical aspects of playing; it’s about developing a deeper connection with the music and expressing your emotions through the guitar. Fingerstyle allows you to create a personal and intimate sound that is both captivating and emotionally resonant. It’s a journey of self-discovery, where you explore your creativity and develop your own unique style.
The ability to play a beautiful love song with fingerstyle guitar is a gift that you can share with others. It’s a way to express your love, gratitude, and appreciation. It’s a way to connect with people on a deeper level and to create lasting memories. So, embrace the challenge, enjoy the process, and let your fingers do the talking.
Ready to Start Your Fingerstyle Journey?
This step by step acoustic love song fingerstyle tutorial has provided you with the knowledge and tools you need to begin your fingerstyle journey. Remember to practice consistently, be patient with yourself, and most importantly, have fun! Share your progress and favorite fingerstyle love songs in the comments below. We encourage you to explore advanced guides and lessons to further refine your skills and expand your repertoire. Contact experienced fingerstyle guitar instructors for personalized guidance and feedback to accelerate your learning process.
