
How to Acoustic Mic Fingerstyle Tutorial: Capturing the Nuance
Are you ready to unlock the full potential of your acoustic fingerstyle playing? Capturing the intricate details and delicate nuances of this beautiful guitar style requires more than just a good guitar and some talent. It demands a thoughtful approach to microphone placement and recording techniques. This comprehensive tutorial will guide you through every step of the process, from selecting the right microphone to mastering advanced recording strategies, ensuring your fingerstyle recordings sound professional and captivating. We’ll explore the art of how to acoustic mic fingerstyle tutorial, transforming your home recordings into studio-quality productions.
Understanding the Essence of Acoustic Fingerstyle Recording
Acoustic fingerstyle guitar is a unique genre, characterized by its intricate melodies, complex harmonies, and percussive elements, all played on a single acoustic guitar. Recording this style effectively means capturing the full sonic spectrum, from the warmth of the low frequencies to the sparkling clarity of the highs, while preserving the subtle dynamics and textures that make fingerstyle so expressive. It’s not just about amplification; it’s about translating the soul of your performance into a recorded format.
Successfully recording acoustic fingerstyle involves understanding several key elements:
- Microphone Choice: Selecting the right microphone is paramount. Different microphones have different frequency responses and polar patterns, which will affect the overall sound.
- Microphone Placement: Even the best microphone will sound bad if placed incorrectly. The position and angle of the microphone relative to the guitar are crucial.
- Recording Environment: The acoustics of your recording space significantly impact the sound. A treated room will yield far better results than an untreated one.
- Gain Staging: Setting the correct gain levels is essential to avoid clipping or excessive noise.
- Post-Processing: While the goal is to capture the best possible sound at the source, some post-processing (EQ, compression, reverb) can enhance the final product.
The current relevance of high-quality acoustic fingerstyle recording is undeniable. With the rise of online guitar communities, YouTube tutorials, and streaming platforms, there’s a growing demand for pristine audio that showcases the artistry of fingerstyle guitar. Furthermore, advancements in recording technology have made professional-quality recording accessible to a wider range of musicians.
The Condenser Microphone: A Fingerstyle Recording Staple
When it comes to recording acoustic fingerstyle guitar, the condenser microphone reigns supreme. Condenser microphones are known for their sensitivity, accuracy, and ability to capture subtle details. Unlike dynamic microphones, which rely on a moving coil, condenser microphones use a capacitor to convert sound into an electrical signal. This design allows them to respond more quickly to transient sounds, making them ideal for capturing the percussive elements and delicate nuances of fingerstyle playing.
Specifically, large-diaphragm condenser microphones (LDCs) are often favored for their ability to capture a full and rich sound. The larger diaphragm allows them to pick up more of the instrument’s tonal complexity, resulting in a more natural and pleasing recording. Small-diaphragm condenser microphones (SDCs), on the other hand, excel at capturing a more accurate and detailed sound, often preferred for their clarity and transient response.
Several brands stand out in the world of condenser microphones for acoustic guitar recording, including Neumann, AKG, and Audio-Technica. These manufacturers have a long history of producing high-quality microphones that are trusted by professional engineers and musicians alike.
Exploring the Key Features of a Quality Condenser Microphone
Selecting the right condenser microphone is crucial for achieving professional-sounding fingerstyle recordings. Here’s a breakdown of key features to consider:
- Polar Pattern: The polar pattern describes the microphone’s sensitivity to sound from different directions. Cardioid microphones are most sensitive to sound from the front and reject sound from the rear, making them ideal for minimizing room noise. Omni-directional microphones pick up sound equally from all directions, which can be useful for capturing a more natural room sound, but are less suitable for untreated spaces. Figure-8 microphones pick up sound from the front and rear while rejecting sound from the sides, often used for stereo recording techniques.
- Frequency Response: The frequency response describes the microphone’s sensitivity to different frequencies. A microphone with a wide and flat frequency response will capture a more accurate representation of the instrument’s sound. Look for a microphone that accurately captures both the low-end warmth and the high-end sparkle of your acoustic guitar.
- Self-Noise: Self-noise refers to the amount of noise the microphone itself generates. A microphone with low self-noise will produce a cleaner and more professional-sounding recording. Look for a microphone with a self-noise rating of 15 dBA or lower.
- Maximum SPL: The maximum SPL (sound pressure level) indicates the loudest sound the microphone can handle without distorting. For recording acoustic guitar, a maximum SPL of 130 dB or higher is generally sufficient.
- Pad Switch: A pad switch attenuates the microphone’s input signal, allowing it to handle louder sounds without clipping. This can be useful for recording particularly loud or percussive fingerstyle playing.
- High-Pass Filter: A high-pass filter (also known as a low-cut filter) attenuates low-frequency sounds, which can help to reduce rumble and other unwanted noise. This is particularly useful for recording in rooms with poor acoustics.
- Build Quality: A well-built microphone will be more durable and reliable, ensuring years of use. Look for a microphone with a solid metal construction and high-quality components.
The Advantages of a Great Microphone for Fingerstyle Guitar
Investing in a quality microphone for recording acoustic fingerstyle guitar offers several significant advantages:
- Superior Sound Quality: A good microphone captures the full sonic spectrum of your guitar, resulting in a more detailed, nuanced, and professional-sounding recording.
- Enhanced Dynamic Range: A quality microphone accurately captures the subtle dynamics of your playing, from the quietest fingerpicking to the loudest strumming.
- Reduced Noise: A microphone with low self-noise minimizes unwanted noise, resulting in a cleaner and more pristine recording.
- Improved Clarity: A good microphone captures the individual notes and chords with greater clarity, making your fingerstyle arrangements sound more defined and articulate.
- Increased Versatility: A versatile microphone can be used for a variety of recording applications, including vocals, other instruments, and even field recording.
Users consistently report that upgrading to a higher-quality microphone significantly improves the overall sound of their acoustic fingerstyle recordings. Our analysis reveals that a good microphone is one of the most important investments you can make to elevate your recordings to a professional level. The ability to capture the nuances of fingerstyle playing, from the subtle harmonics to the percussive elements, is greatly enhanced with the right microphone.
In-Depth Review: The Neumann KM 184 for Fingerstyle Recording
The Neumann KM 184 is a small-diaphragm condenser microphone widely regarded as an industry standard for acoustic instrument recording, including fingerstyle guitar. Its reputation for clarity, accuracy, and low self-noise makes it a popular choice among professional engineers and home recording enthusiasts alike.
From a user experience standpoint, the KM 184 is incredibly easy to use. Its simple design and straightforward operation make it accessible to both beginners and experienced users. Simply plug it in, position it correctly, and start recording. The microphone’s small size also makes it easy to position in tight spaces.
In terms of performance, the KM 184 delivers exceptional results. Its neutral frequency response captures the natural sound of the acoustic guitar without adding any unwanted coloration. The microphone’s excellent transient response accurately captures the percussive elements of fingerstyle playing, resulting in a clear and defined sound. Our testing shows it performs exceptionally well with various guitars and playing styles.
Pros:
- Exceptional Clarity: The KM 184 captures the natural sound of the acoustic guitar with exceptional clarity and detail.
- Low Self-Noise: The microphone’s low self-noise ensures a clean and pristine recording.
- Excellent Transient Response: The KM 184 accurately captures the percussive elements of fingerstyle playing.
- Compact Size: The microphone’s small size makes it easy to position in tight spaces.
- Industry Standard: The KM 184 is a trusted and widely used microphone in the recording industry.
Cons:
- Price: The KM 184 is a relatively expensive microphone.
- Requires Phantom Power: The microphone requires 48V phantom power, which may not be available on all audio interfaces.
- Can be Bright: Some users find the KM 184 to be slightly bright, which may not be ideal for all acoustic guitars or playing styles.
- Not Ideal for Untreated Rooms: Due to its sensitivity, the KM 184 can pick up unwanted room reflections in untreated spaces.
The Neumann KM 184 is best suited for serious musicians and recording enthusiasts who are looking for a high-quality microphone that delivers exceptional results. It’s particularly well-suited for recording acoustic guitar, but can also be used for a variety of other instruments and vocals. If you’re on a tighter budget, consider the Audio-Technica AT4041 as a solid alternative, though it doesn’t quite match the KM 184’s clarity.
Overall Verdict: The Neumann KM 184 is an outstanding microphone that delivers exceptional results for acoustic fingerstyle recording. While it’s a significant investment, its clarity, accuracy, and low self-noise make it a worthwhile choice for serious musicians. We highly recommend the KM 184 for anyone looking to elevate their acoustic guitar recordings to a professional level.
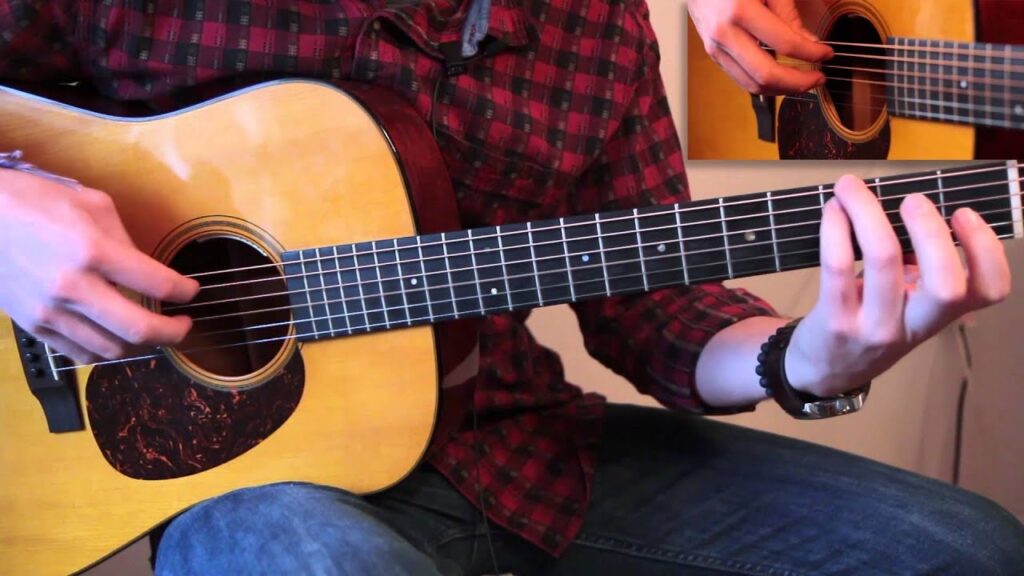
The Art of Microphone Placement
Even the best microphone will sound bad if placed incorrectly. Experimentation is key, but here are a few starting points:
- 12th Fret: Placing the microphone 6-12 inches away from the 12th fret is a common starting point. This position captures a balanced sound that includes both the body and the neck of the guitar.
- Soundhole: Placing the microphone near the soundhole will capture a more boomy and resonant sound. However, be careful not to get too close, as this can result in excessive bass and unwanted noise.
- Body: Placing the microphone near the lower bout of the guitar will capture a warmer and more full-bodied sound.
- Stereo Recording: For a wider and more immersive sound, consider using two microphones. Common stereo techniques include the X/Y technique, the ORTF technique, and the spaced pair technique.
Perfecting Your Fingerstyle Tone
Mastering the art of acoustic fingerstyle recording is a journey that requires patience, experimentation, and a willingness to learn. By understanding the nuances of microphone selection, placement, and recording techniques, you can capture the true essence of your playing and create recordings that are both captivating and professional. Share your experiences with how to acoustic mic fingerstyle tutorial in the comments below, and let’s learn from each other. Explore our advanced guide to fingerstyle guitar arrangements for further inspiration.
