Acoustic Recording Mastery: Top Tips & Song Choices for 2025
Embarking on the journey of acoustic recording is an incredibly rewarding experience, allowing artists to capture the raw emotion and intimate nuances of their music. As we look towards 2025, the landscape of home recording continues to evolve, offering both exciting opportunities and unique challenges. This comprehensive guide provides essential acoustic recording tips and curated song list suggestions to help you achieve professional-quality results in your home studio. Whether you’re a seasoned musician or just starting out, understanding the latest techniques and song selection strategies is crucial for creating recordings that resonate with your audience. We’ll explore everything from optimizing your recording space to selecting the perfect microphone and mastering essential mixing techniques. Get ready to elevate your acoustic recordings to new heights.
Optimizing Your Acoustic Recording Space for 2025
The foundation of any great acoustic recording lies in the quality of your recording environment. In 2025, even with advancements in digital processing, a well-treated room remains paramount. Here’s how to transform your space:
Room Treatment Essentials
Acoustic treatment is not about soundproofing (keeping sound in or out), but rather about controlling reflections within the room. Key elements include:
- Absorption: Bass traps in corners are crucial for taming low-frequency build-up, which can muddy your recordings. Broadband absorbers strategically placed on walls help reduce unwanted reflections, creating a cleaner, more focused sound.
- Diffusion: Diffusers scatter sound waves, preventing flutter echoes and standing waves. They’re particularly useful on the rear wall of your recording space to create a more spacious and natural sound.
- Placement Matters: Experiment with microphone and instrument placement to find the “sweet spot” in your room where the sound is most balanced and free of unwanted reflections.
DIY Acoustic Treatment Options
Professional acoustic panels can be expensive, but there are cost-effective DIY alternatives:
- Rockwool or Fiberglass Panels: These are highly effective absorbers that can be easily built into frames and covered with fabric.
- Heavy Blankets or Curtains: While not as effective as dedicated acoustic panels, heavy blankets or curtains can help dampen reflections, especially in smaller spaces.
- Bookcases: A well-stocked bookcase can act as a diffuser, scattering sound waves and preventing flutter echoes.
Minimizing Noise Pollution
External noise can ruin an otherwise perfect take. Consider these strategies:
- Identify Noise Sources: Listen carefully for any sources of unwanted noise, such as traffic, air conditioning, or computer fans.
- Isolate Your Recording Space: Close windows and doors, and use weather stripping to seal any gaps.
- Use a Reflection Filter: A reflection filter placed behind your microphone can help reduce room reflections and isolate your sound source.
Microphone Selection and Placement Strategies for Acoustic Instruments
Choosing the right microphone and positioning it correctly are critical for capturing the true essence of your acoustic instruments. Here’s a breakdown of essential considerations:
Microphone Types for Acoustic Recording
- Condenser Microphones: Known for their sensitivity and detail, condenser microphones are ideal for capturing the nuances of acoustic instruments. Large-diaphragm condensers are particularly well-suited for vocals and instruments with a wide dynamic range.
- Dynamic Microphones: More robust and less sensitive than condensers, dynamic microphones are a good choice for louder instruments or situations where background noise is a concern.
- Ribbon Microphones: Ribbon microphones offer a warm, vintage sound that can be particularly flattering on acoustic guitars and vocals. They are more delicate than dynamic or condenser microphones and require careful handling.
Essential Microphone Techniques
- The Proximity Effect: Be aware that moving a microphone closer to a sound source increases the bass response. Experiment with different distances to find the sweet spot for your instrument.
- Off-Axis Recording: Pointing the microphone slightly off-axis (away from the direct sound source) can help reduce harshness and capture a more natural sound.
- Stereo Recording Techniques: Explore stereo miking techniques such as X-Y, ORTF, and spaced pair to create a wider, more immersive soundstage.
Specific Instrument Miking Tips
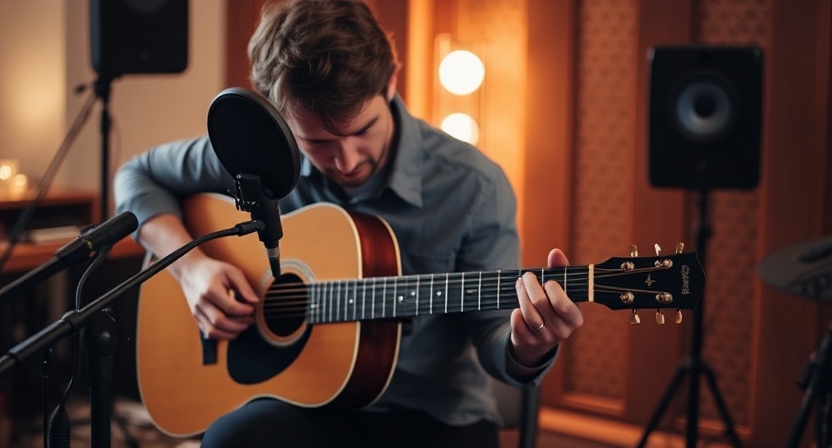
- Acoustic Guitar: Position the microphone 6-12 inches away from the soundhole, aiming towards the point where the neck joins the body.
- Vocals: Use a pop filter to prevent plosives (bursts of air from “p” and “b” sounds) from overloading the microphone. Experiment with different microphone angles and distances to find the most flattering sound for your voice.
- Piano: For a grand piano, try placing two microphones inside the piano, one over the high strings and one over the low strings. For an upright piano, try placing a microphone a few feet away from the soundboard.
Essential Recording Equipment and Software for 2025
Beyond microphones and acoustic treatment, several other pieces of equipment and software are crucial for creating professional-sounding acoustic recordings in 2025:
Audio Interface
An audio interface is the bridge between your microphones and your computer. It converts analog signals from your microphones into digital signals that your computer can understand. Look for an interface with high-quality preamps, low latency, and sufficient inputs for your recording needs.
Digital Audio Workstation (DAW)
A DAW is the software you’ll use to record, edit, and mix your acoustic recordings. Popular DAWs include:
- Ableton Live: Known for its intuitive workflow and powerful creative tools.
- Logic Pro X: A comprehensive DAW with a wide range of features and instruments.
- Pro Tools: The industry-standard DAW for professional recording and mixing.
- Cubase: A versatile DAW with a strong focus on music production.
Studio Monitors and Headphones
Accurate monitoring is essential for making informed mixing decisions. Invest in a pair of high-quality studio monitors and headphones that provide a neutral and balanced sound. Closed-back headphones are ideal for recording, as they prevent sound from bleeding into the microphone.
Cables and Accessories
Don’t overlook the importance of quality cables and accessories. Invest in XLR cables for connecting your microphones to your audio interface, and ensure you have a sturdy microphone stand and pop filter.
A Curated Song List for Acoustic Recording in 2025
Choosing the right song is as important as the recording process itself. Here’s a curated list of songs that are well-suited for acoustic recording, spanning various genres and skill levels:
Beginner-Friendly Acoustic Songs
- “Hallelujah” by Leonard Cohen: A timeless classic with a simple chord progression and a powerful melody.
- “Knockin’ on Heaven’s Door” by Bob Dylan: Another easy-to-learn song with a memorable chorus.
- “Riptide” by Vance Joy: A catchy and upbeat song with a simple ukulele arrangement.
- “Wonderwall” by Oasis: A popular and recognizable song with a straightforward chord structure.
Intermediate Acoustic Songs
- “Landslide” by Fleetwood Mac: A beautiful and introspective song with a more complex fingerpicking pattern.
- “Fast Car” by Tracy Chapman: A powerful and emotional song with a driving acoustic guitar riff.
- “Skinny Love” by Bon Iver: A haunting and atmospheric song with intricate vocal harmonies.
- “The Sound of Silence” by Simon & Garfunkel: A classic folk song with a delicate and nuanced arrangement.
Advanced Acoustic Songs
- “Blackbird” by The Beatles: A challenging fingerpicking piece with a beautiful melody.
- “Classical Gas” by Mason Williams: An instrumental piece that showcases advanced guitar techniques.
- “Hurt” by Johnny Cash: A raw and emotional performance with a simple yet powerful arrangement.
- “Tears in Heaven” by Eric Clapton: A heartfelt and poignant song with a complex chord progression.
Mastering Essential Mixing Techniques for Acoustic Recordings
Mixing is the process of blending and shaping the individual tracks in your recording to create a cohesive and polished final product. Here are some essential mixing techniques for acoustic recordings:
EQ (Equalization)
EQ is used to adjust the frequency content of individual tracks. Use EQ to remove unwanted frequencies, enhance desirable frequencies, and create a balanced overall sound. For acoustic instruments, try subtly boosting the high frequencies to add clarity and sparkle.
Compression
Compression is used to reduce the dynamic range of a track, making it sound louder and more consistent. Use compression sparingly on acoustic instruments to avoid squashing the natural dynamics. A subtle amount of compression can help vocals sit better in the mix.
Reverb
Reverb simulates the acoustic space in which the recording was made. Use reverb to add depth and dimension to your acoustic recordings. Experiment with different types of reverb, such as plate, hall, and room, to find the sound that best suits your song.
Delay
Delay creates a repeating echo effect. Use delay to add interest and texture to your acoustic recordings. A subtle delay on vocals can create a sense of space and depth.
Panning
Panning is used to position tracks in the stereo field. Use panning to create a wide and immersive soundstage. For example, you might pan the acoustic guitar slightly to the left and the vocals slightly to the right.
Troubleshooting Common Acoustic Recording Problems
Even with the best equipment and techniques, you may encounter problems during the acoustic recording process. Here are some common issues and how to troubleshoot them:
Excessive Room Noise
If you’re picking up too much room noise in your recordings, try moving the microphone closer to the sound source, using a more directional microphone, or adding more acoustic treatment to your room.
Muddy Low Frequencies
If your recordings sound muddy or boomy, try using a high-pass filter on individual tracks to remove unwanted low frequencies. Also, make sure you have adequate bass trapping in your room.
Harsh High Frequencies
If your recordings sound harsh or brittle, try using a de-esser on vocals to tame sibilance. You can also try using a ribbon microphone or rolling off the high frequencies with EQ.
Lack of Clarity
If your recordings sound dull or lifeless, try boosting the high frequencies with EQ. You can also try using a brighter microphone or experimenting with different microphone placements.
Embracing the Future of Acoustic Recording
As we move further into 2025, the world of acoustic recording continues to evolve. New technologies and techniques are constantly emerging, offering musicians and engineers even greater creative possibilities. By staying informed and embracing these advancements, you can continue to push the boundaries of acoustic recording and create music that is both technically sound and emotionally resonant. The tips and techniques presented here are just a starting point. The most important thing is to experiment, explore, and find what works best for you. Happy recording!
