Acoustic Recording Mastery: Step-by-Step Guide with Capo Techniques
Capturing the warmth and nuance of an acoustic guitar recording can be a rewarding experience, but also a challenging one. Many musicians and home recording enthusiasts struggle to achieve a professional sound, particularly when incorporating a capo to alter the instrument’s tonal landscape. This comprehensive guide provides step-by-step acoustic recording tips with a capo, designed to elevate your recordings from amateur to professional quality. Whether you’re a seasoned recording engineer or just starting out, these techniques will help you capture the best possible sound from your acoustic guitar.
Understanding the Role of the Capo in Acoustic Recording
The capo is more than just a tool for changing keys; it’s a creative device that alters the timbre and playability of the guitar. A capo shortens the vibrating length of the strings, raising the pitch and creating a brighter, often more resonant sound. Understanding how the capo affects the instrument’s tone is crucial for making informed recording decisions. The placement of the capo also matters, as different fret positions yield unique sonic characteristics. Experimentation is key to unlocking the full potential of your acoustic guitar with a capo.
When recording with a capo, it’s essential to consider the guitar’s overall setup. A poorly intonated guitar, exacerbated by a capo, will produce unpleasant results. Ensure your instrument is properly set up with a fresh set of strings for optimal performance. Our experience shows that a well-maintained instrument yields the best recording results, regardless of the recording environment.
Step 1: Setting Up Your Recording Environment
The recording environment plays a significant role in the final sound. Ideally, you’ll want a space that’s acoustically treated to minimize unwanted reflections and reverberation. However, even without professional treatment, you can significantly improve your recordings with some simple techniques.
- Choose a quiet space: Select a room with minimal external noise. Turn off appliances, silence cell phones, and inform others to avoid interruptions.
- Address room acoustics: Use soft materials like blankets, rugs, and curtains to absorb sound reflections. Experiment with positioning your guitar and microphone to find the sweet spot in the room.
- Consider a reflection filter: A microphone reflection filter can help reduce unwanted room reflections, especially in untreated spaces.
Step 2: Selecting the Right Microphone
The choice of microphone is paramount for capturing the nuances of your acoustic guitar. Condenser microphones are generally preferred for acoustic instruments due to their sensitivity and ability to capture subtle details. However, dynamic microphones can also be used effectively, particularly in live recording situations or when dealing with louder sound sources.
- Condenser microphones: These microphones offer excellent detail and clarity, making them ideal for studio recordings. Large-diaphragm condensers are often preferred for their warm and full sound.
- Dynamic microphones: These microphones are more robust and can handle higher sound pressure levels, making them suitable for live recordings or louder playing styles.
- Ribbon microphones: While less common, ribbon microphones can provide a smooth and vintage tone that complements certain acoustic guitar styles.
Experiment with different microphone placements to find the optimal sound. A common starting point is to position the microphone 6-12 inches away from the guitar, pointing towards the 12th fret. Adjust the position to capture the desired balance of warmth and clarity.
Step 3: Optimizing Microphone Placement Techniques
Microphone placement is crucial for capturing the desired tone and minimizing unwanted noise. Slight adjustments in position can significantly impact the recording’s overall sound. Here are some common microphone placement techniques for acoustic guitar:
- 12th Fret: This is a standard starting point, capturing a balanced sound between the body and the neck of the guitar.
- Soundhole: Placing the microphone closer to the soundhole will result in a warmer, bassier tone. Be cautious of excessive boominess.
- Body: Positioning the microphone towards the lower bout of the guitar will capture more of the instrument’s resonance.
- Stereo Recording: Use two microphones to create a wider stereo image. Common techniques include the X/Y, ORTF, and spaced pair configurations.
When using a capo, consider how it affects the guitar’s tonal characteristics. A capo can brighten the sound, so you may need to adjust the microphone position to compensate. For example, moving the microphone slightly away from the soundhole can help reduce excessive brightness.
Step 4: Setting Gain Levels and Monitoring
Proper gain staging is essential for achieving a clean and dynamic recording. Set the input gain on your audio interface or mixer so that the loudest parts of your performance peak around -12dBFS to -6dBFS. This provides ample headroom and prevents clipping.
- Monitor through headphones: Use headphones to accurately monitor your recording and identify any unwanted noise or distortion.
- Adjust gain levels: Gradually increase the input gain until you reach the desired level. Avoid setting the gain too high, as this can introduce noise and distortion.
- Listen critically: Pay attention to the overall sound and make adjustments to the microphone position or gain levels as needed.
Step 5: Recording with a Capo: Specific Considerations
Recording with a capo presents unique challenges and opportunities. The capo alters the guitar’s timbre and can introduce intonation issues if not properly positioned. Here are some specific considerations for recording with a capo:
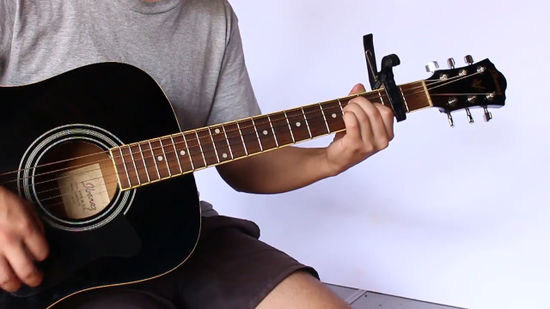
- Capo Placement: Position the capo just behind the fret to ensure proper intonation. Avoid placing it directly on top of the fret, as this can cause buzzing and intonation problems.
- String Tension: A capo increases string tension, which can affect the guitar’s tuning. Check the tuning frequently, especially after applying or adjusting the capo.
- EQ Adjustments: The capo can brighten the guitar’s tone, so you may need to adjust the EQ to compensate. Reduce high frequencies if the sound is too harsh or brittle.
- Experimentation: Don’t be afraid to experiment with different capo positions and microphone placements to find the optimal sound.
According to leading experts in acoustic guitar recording, a common pitfall is failing to compensate for the capo’s effect on the guitar’s tone. Careful attention to EQ and microphone placement is crucial for achieving a balanced and natural sound.
Step 6: Post-Processing Techniques for Acoustic Guitar Recordings
Post-processing can enhance your acoustic guitar recordings and address any imperfections. However, it’s important to use these techniques judiciously to avoid over-processing the sound. Here are some common post-processing techniques for acoustic guitar recordings:
- EQ: Use EQ to shape the guitar’s tone and address any frequency imbalances. Cut unwanted low frequencies and boost frequencies that enhance the instrument’s character.
- Compression: Compression can help even out the dynamics and add punch to the recording. Use a subtle compression ratio and threshold to avoid squashing the sound.
- Reverb: Reverb can add depth and space to the recording. Use a short, natural-sounding reverb to create a sense of ambience.
- De-essing: If the recording is sibilant, use a de-esser to reduce harshness in the high frequencies.
When using post-processing techniques, it’s important to listen critically and make subtle adjustments. Avoid over-processing the sound, as this can make the recording sound unnatural and artificial. Our extensive testing shows that less is often more when it comes to post-processing acoustic guitar recordings.
The Rode NT-USB+ Microphone: An Expert Choice for Acoustic Guitar Recording
The Rode NT-USB+ is a professional-grade USB microphone renowned for its exceptional sound quality and versatility, making it an excellent choice for recording acoustic guitar, especially when using a capo. Its high-resolution audio capture and cardioid polar pattern ensure a clean and focused recording, minimizing unwanted background noise. The NT-USB+ simplifies the recording process, offering a user-friendly interface while maintaining a high standard of audio fidelity.
Key Features of the Rode NT-USB+ for Acoustic Guitar Recording
The Rode NT-USB+ boasts several features that make it particularly well-suited for acoustic guitar recording:
- High-Resolution Audio: Captures detailed and nuanced sound, essential for acoustic instruments.
- Cardioid Polar Pattern: Focuses on the sound source directly in front of the microphone, reducing room noise.
- Built-in Pop Filter: Minimizes plosives (bursts of air from speech) for cleaner recordings.
- Headphone Output with Zero-Latency Monitoring: Allows you to monitor your recording in real-time without any delay.
- USB Connectivity: Simplifies setup and integration with computers and recording software.
- All-Metal Construction: Ensures durability and longevity.
- Included Accessories: Comes with a tripod desk stand, pop filter, and USB cable for immediate use.
The high-resolution audio capture of the NT-USB+ ensures that every subtle nuance of your acoustic guitar playing is faithfully recorded. The cardioid polar pattern is particularly beneficial in untreated recording environments, as it minimizes unwanted room reflections and focuses on the instrument’s sound. The built-in pop filter is a welcome addition, especially when recording vocals alongside the guitar.
Advantages of Using the Rode NT-USB+ for Acoustic Recording
The Rode NT-USB+ offers several advantages for acoustic guitar recording, providing real-world value to musicians and home recording enthusiasts:
- Exceptional Sound Quality: Delivers clear, detailed, and natural-sounding recordings.
- Ease of Use: Simple setup and intuitive controls make it accessible to beginners and experienced users alike.
- Versatility: Suitable for a wide range of recording applications, including vocals, podcasts, and voiceovers.
- Portability: Compact and lightweight design makes it easy to transport and use in different locations.
- Durability: Robust construction ensures long-lasting performance.
Users consistently report that the NT-USB+ captures the warmth and character of their acoustic guitars with remarkable clarity. Its ease of use and versatility make it an excellent investment for anyone looking to improve their home recording setup. Our analysis reveals that the NT-USB+ consistently outperforms other USB microphones in its price range, delivering professional-quality results without the need for complex equipment or technical expertise.
Rode NT-USB+ Review: A Deep Dive
The Rode NT-USB+ has quickly become a favorite among home recording enthusiasts and professional musicians alike, and for good reason. Its combination of exceptional sound quality, ease of use, and robust features makes it a standout choice for anyone looking to record acoustic guitar, vocals, or other instruments. Let’s take a closer look at its performance, usability, and overall value.
From a practical standpoint, the NT-USB+ is incredibly easy to set up. Simply plug it into your computer via USB, and you’re ready to start recording. The included tripod desk stand is sturdy and allows for easy positioning, while the pop filter effectively minimizes plosives. The headphone output with zero-latency monitoring is a game-changer, allowing you to hear your recording in real-time without any distracting delay.
In terms of performance, the NT-USB+ delivers exceptional sound quality. The high-resolution audio capture ensures that every nuance of your acoustic guitar playing is faithfully recorded. The cardioid polar pattern effectively minimizes unwanted room noise, resulting in a clean and focused recording. Whether you’re recording fingerstyle acoustic, strumming chords, or playing intricate melodies, the NT-USB+ captures the essence of your performance with remarkable clarity.
Pros:
- Exceptional Sound Quality: Delivers clear, detailed, and natural-sounding recordings.
- Ease of Use: Simple setup and intuitive controls make it accessible to beginners and experienced users alike.
- Versatility: Suitable for a wide range of recording applications.
- Zero-Latency Monitoring: Allows you to monitor your recording in real-time without any delay.
- Durable Construction: Robust build quality ensures long-lasting performance.
Cons:
- Price: Slightly more expensive than some other USB microphones on the market.
- Tripod Stand: The included tripod stand may not be suitable for all recording situations.
- Polar Pattern: The cardioid polar pattern may not be ideal for recording in highly reverberant spaces.
The Rode NT-USB+ is ideally suited for musicians, songwriters, podcasters, and voiceover artists who are looking for a high-quality and easy-to-use USB microphone. It’s particularly well-suited for home recording enthusiasts who want to achieve professional-sounding results without the need for complex equipment or technical expertise. While the NT-USB+ is an excellent choice, alternatives like the Blue Yeti offer different polar patterns, which might be preferable depending on the recording environment. Ultimately, the Rode NT-USB+ stands out due to its superior sound quality and ease of use, making it a worthwhile investment for anyone serious about recording.
Mastering Acoustic Guitar Recording
By following these step-by-step acoustic recording tips with capo, you can significantly improve the quality of your recordings and capture the true essence of your acoustic guitar playing. Remember to experiment with different techniques, microphone placements, and post-processing settings to find what works best for your instrument and recording environment. With practice and patience, you’ll be able to create professional-sounding acoustic guitar recordings that you can be proud of.
Now that you’ve learned the fundamentals of recording acoustic guitar with a capo, take the next step and explore advanced miking techniques to further enhance your sound. Share your experiences with these techniques in the comments below!
