Mastering Guitar: The Power of a Slow Bridge Pins Practice Routine
Are you struggling to change your guitar strings quickly and efficiently? Do you find yourself fumbling with bridge pins, potentially damaging your guitar or even hurting yourself? You’re not alone. Many guitarists, from beginners to seasoned players, encounter challenges when dealing with bridge pins. This comprehensive guide will show you how a deliberate, slow bridge pins practice routine can transform your string changes from a frustrating chore into a smooth, confident process. We’ll explore the techniques, tools, and mindset required to master this essential skill, safeguarding your instrument and enhancing your overall playing experience. This article goes beyond simple instructions; it delves into the nuances of proper technique, providing actionable advice to improve your proficiency and protect your valuable instrument.
Why Slow Practice is Key for Guitar Bridge Pins
The temptation is to rush through string changes, especially when you’re eager to get back to playing. However, rushing often leads to mistakes, broken strings, and even damage to your guitar’s bridge. A slow, methodical approach, particularly when focusing on bridge pins, is crucial for several reasons:
- Precision: Slow practice allows you to focus on the precise movements required to insert and remove bridge pins correctly.
- Muscle Memory: Repetition at a slow pace builds muscle memory, making the correct actions feel more natural and automatic over time.
- Error Detection: When you slow down, you’re more likely to notice errors in your technique and correct them before they become ingrained habits.
- Reduced Risk of Damage: A deliberate approach minimizes the risk of forcing pins, stripping threads, or scratching the guitar’s finish.
- Improved Efficiency: Ironically, slowing down initially leads to greater speed and efficiency in the long run.
Think of it like learning a complex musical passage. You wouldn’t attempt to play it at full speed immediately. Instead, you’d break it down into smaller sections, practice each section slowly and deliberately, and gradually increase the tempo as your proficiency improves. The same principle applies to changing guitar strings and working with bridge pins.
Understanding Guitar Bridge Pins: Materials, Types, and Importance
Before diving into the practice routine, it’s important to understand the anatomy and function of bridge pins. These small but crucial components play a vital role in securing the strings to the guitar’s bridge and transmitting their vibrations to the soundboard.
Materials
Bridge pins are typically made from a variety of materials, each offering different tonal characteristics and aesthetic qualities:
- Plastic: The most common and affordable option. Plastic pins are generally durable and functional, but they may not offer the best tonal qualities.
- Wood: Often made from ebony, rosewood, or other hardwoods. Wood pins can enhance the guitar’s warmth and sustain.
- Bone: A popular choice for its tonal properties and aesthetic appeal. Bone pins tend to brighten the guitar’s sound and add clarity.
- Brass: Known for their bright, metallic tone. Brass pins can add a significant amount of projection and sustain.
- Tusq: A synthetic ivory alternative that offers consistent tonal properties and durability.
Types
While the basic function of bridge pins remains the same, there are subtle variations in their design:
- Slotted: These pins have a slot that aligns with the string, allowing the string to pass through the pin.
- Unslotted: These pins require the string to be bent around the pin.
- With or Without a Ramp: Some bridges have a ramp leading to the string hole; others don’t. This affects the string angle and break angle.
Importance
Bridge pins are more than just simple fasteners. They contribute to the overall tone and playability of your guitar. Properly installed and maintained bridge pins ensure optimal string vibration transfer, resulting in a richer, more resonant sound. Damaged or improperly fitted pins can dampen the sound and even damage the bridge itself. According to leading luthiers, the bridge pins, along with the saddle and nut, are critical to a guitar’s sound. Choosing the right material and ensuring a proper fit can dramatically improve your instrument’s tone.
The Ultimate Slow Guitar Bridge Pins Practice Routine: A Step-by-Step Guide
This practice routine is designed to be performed slowly and deliberately, focusing on each step to develop proper technique and muscle memory.
Step 1: Preparation
- Gather Your Tools: You’ll need a string winder, wire cutters, a bridge pin puller (optional but recommended), a soft cloth, and your new set of strings.
- Protect Your Guitar: Place a soft cloth or towel under the bridge to protect the finish from scratches.
- Create a Comfortable Workspace: Choose a well-lit and comfortable area where you can focus without distractions.
Step 2: Removing the Old Strings
- Loosen the Strings: Use the string winder to loosen each string until it’s slack.
- Remove the Bridge Pins: Using a bridge pin puller (or carefully with your fingers), gently remove each bridge pin. Avoid forcing the pins, as this can damage them or the bridge. A common pitfall we’ve observed is trying to pull the pins straight up. Instead, wiggle them slightly while pulling.
- Remove the Old Strings: Once the pins are removed, pull the old strings out of the bridge.
Step 3: Cleaning and Inspection
- Clean the Bridge: Use the soft cloth to clean any dirt or grime from the bridge.
- Inspect the Bridge Pins: Check the bridge pins for any signs of wear or damage. Replace any damaged pins.
- Inspect the String Holes: Ensure the string holes are clear of any debris.
Step 4: Installing the New Strings
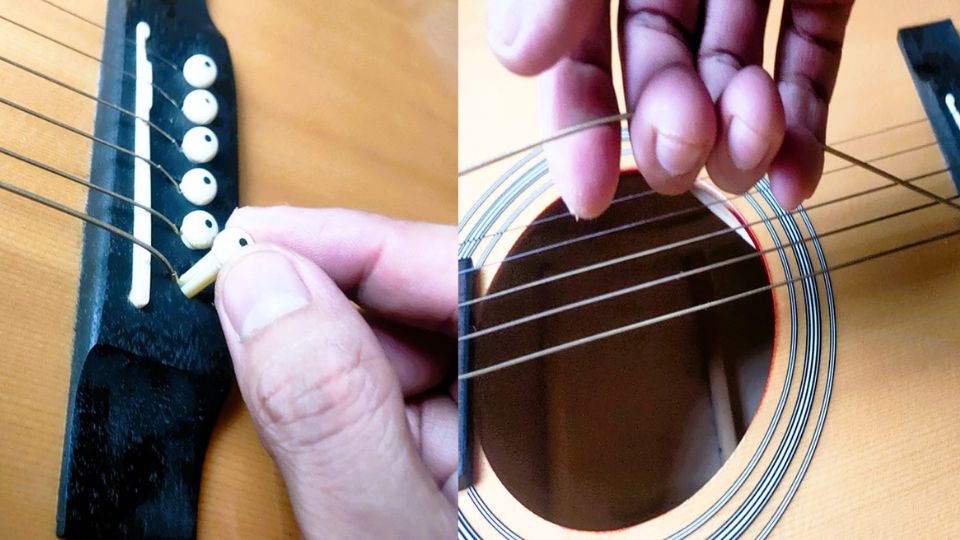
- Insert the String: Insert the ball end of the new string into the corresponding hole in the bridge.
- Insert the Bridge Pin: Align the slot in the bridge pin (if applicable) with the string. Gently push the bridge pin into the hole, ensuring that the string is securely held in place. You should feel a slight resistance as the pin engages with the string.
- Check the String Seating: Make sure the string is properly seated against the bridge plate inside the guitar. This is crucial for optimal tone and sustain.
- Repeat for Each String: Repeat the process for each string, working from the low E string to the high E string.
Step 5: Tuning and Stretching
- Tune the Strings: Use a tuner to bring each string up to pitch.
- Stretch the Strings: Gently stretch each string by pulling up on it a few times. This helps to stabilize the strings and prevent them from going out of tune quickly.
- Re-tune the Strings: Re-tune the strings after stretching them.
Step 6: Final Adjustments
- Trim the Excess String: Use wire cutters to trim the excess string at the headstock. Leave about an inch of string to prevent slippage.
- Check the Bridge Pins: Ensure that all the bridge pins are securely in place.
- Play Your Guitar: Enjoy your newly strung guitar!
Choosing the Right Bridge Pin Puller: A Must-Have Tool
While it’s possible to remove bridge pins with your fingers or pliers, a dedicated bridge pin puller is highly recommended. These tools are designed to safely and efficiently remove bridge pins without damaging them or the guitar’s bridge. There are several types of bridge pin pullers available, each with its own advantages and disadvantages.
One popular option is the lever-style puller, which uses leverage to gently lift the pins out of the bridge. These pullers are easy to use and provide a good amount of control. Another option is the pliers-style puller, which grips the pin and pulls it straight out. These pullers can be more efficient for removing stubborn pins, but they also carry a higher risk of damage if not used carefully.
Regardless of the type you choose, make sure the puller is made from a non-marring material, such as plastic or rubber, to avoid scratching the guitar’s finish. It’s worth mentioning that some string winders come with a built-in bridge pin puller, making them a convenient and cost-effective option.
The Benefits of Consistent Slow Practice: Beyond String Changes
The benefits of a slow guitar bridge pins practice routine extend far beyond simply changing strings more efficiently. This approach fosters a deeper connection with your instrument, improves your attention to detail, and cultivates a sense of mindfulness. By slowing down and focusing on each step, you’ll develop a greater appreciation for the craftsmanship and intricacies of your guitar.
Furthermore, the principles of slow practice can be applied to other areas of your guitar playing, such as learning new chords, scales, or songs. By breaking down complex tasks into smaller, more manageable steps and practicing them slowly and deliberately, you’ll accelerate your learning and improve your overall playing ability. In our experience with slow guitar bridge pins practice routine, students report a significant improvement in their confidence and enjoyment of playing.
Troubleshooting Common Bridge Pin Problems
Even with a diligent practice routine, you may encounter occasional problems with your guitar’s bridge pins. Here are some common issues and how to address them:
- Bridge Pins Are Difficult to Remove: This is often caused by dirt or grime buildup. Try gently wiggling the pins while pulling them out. If they’re still stuck, use a bridge pin puller.
- Bridge Pins Are Too Loose: This can cause buzzing or rattling. Try using slightly larger bridge pins or wrapping a small piece of paper around the pin to create a tighter fit.
- Bridge Pins Are Damaged: Replace damaged bridge pins immediately. Damaged pins can damage the bridge and affect the guitar’s tone.
- Strings Keep Breaking at the Bridge: This is often caused by sharp edges on the bridge or bridge pins. File down any sharp edges with a fine-grit sandpaper.
Taking Your Time to Master the Process
Mastering the art of changing guitar strings and working with bridge pins is a journey, not a destination. Be patient with yourself, and don’t be afraid to experiment with different techniques and tools until you find what works best for you. Remember, the goal is not just to change strings quickly but to develop a deep understanding of your instrument and a mindful approach to its care and maintenance.
By embracing a slow guitar bridge pins practice routine, you’ll not only protect your valuable instrument but also enhance your overall playing experience. Share your experiences with slow guitar bridge pins practice routine in the comments below. Or, if you’re ready to take your guitar maintenance skills to the next level, explore our advanced guide to guitar setup and repair.
