
Unlock Pro Sound: DIY Acoustic Recording Tips & EQ Settings
Achieving professional-quality recordings at home might seem daunting, but with the right knowledge and a few clever techniques, it’s entirely within reach. This comprehensive guide dives deep into the world of DIY acoustic recording, focusing on essential tips and EQ settings to transform your home studio into a sonic haven. Whether you’re a budding musician, podcaster, or voice-over artist, mastering these diy acoustic recording tips eq settings will dramatically improve the clarity, warmth, and overall quality of your recordings, allowing your creative vision to shine.
This article offers a wealth of knowledge, from understanding the fundamentals of room acoustics to mastering the art of equalization. We’ll explore practical techniques for treating your recording space, optimizing microphone placement, and fine-tuning your EQ settings to achieve a polished, professional sound. Get ready to elevate your DIY recording game and unlock the true potential of your home studio.
Understanding the Fundamentals of DIY Acoustic Recording
Before diving into specific tips and EQ settings, it’s crucial to grasp the core principles of acoustic recording. This involves understanding how sound behaves in a room, how different frequencies interact, and how to minimize unwanted reflections and noise.
The Impact of Room Acoustics
The room you record in plays a significant role in the final sound of your recording. Hard surfaces like walls, floors, and ceilings reflect sound waves, creating reverberation and unwanted echoes. These reflections can muddy your recordings, making them sound unclear and unprofessional. Conversely, a room that’s too dead or absorbent can sound unnatural and lifeless.
Effective acoustic treatment aims to strike a balance, controlling reflections and creating a more neutral and balanced sound environment. This doesn’t necessarily require expensive equipment or extensive renovations. Simple DIY solutions can make a significant difference.
Essential Acoustic Treatment Techniques
Here are some effective and affordable DIY acoustic treatment techniques:
- Bass Traps: Positioned in the corners of your room, bass traps absorb low-frequency sound waves, preventing muddiness and boominess. DIY bass traps can be constructed using mineral wool or fiberglass insulation wrapped in fabric.
- Acoustic Panels: These panels absorb mid and high-frequency reflections, reducing reverberation and improving clarity. You can build your own acoustic panels using similar materials as bass traps, mounted on wooden frames.
- Diffusers: Diffusers scatter sound waves, creating a more natural and spacious sound. While more complex to build than absorbers, DIY diffusers can be created using strategically placed pieces of wood or other materials with varying depths.
- Improvisational Solutions: Use existing furniture like bookshelves filled with books, thick curtains, and rugs to absorb sound and reduce reflections. Experiment with placement to find what works best in your space.
Experimentation is key. There are many resources online that provide specific guidance on calculating the necessary amount of acoustic treatment for a given room size.
Microphone Placement: Capturing the Best Sound
Even with excellent acoustic treatment, improper microphone placement can sabotage your recordings. The goal is to position the microphone to capture the desired sound source while minimizing unwanted noise and reflections.
Understanding Microphone Polar Patterns
Microphone polar patterns describe the directionality of a microphone, indicating how sensitive it is to sound from different directions. Common polar patterns include:
- Cardioid: Captures sound primarily from the front, rejecting sound from the rear. Ideal for recording vocals and instruments in noisy environments.
- Omnidirectional: Captures sound equally from all directions. Useful for recording ambient sounds or group performances.
- Figure-8: Captures sound from the front and rear, rejecting sound from the sides. Suitable for stereo recording techniques.
Choosing the right polar pattern for your recording situation is crucial for achieving optimal results.
Optimizing Microphone Position
Experiment with microphone placement to find the sweet spot for your sound source. Consider these factors:
- Distance: Moving the microphone closer to the sound source increases the direct sound and reduces the amount of room ambience. However, getting too close can result in unwanted proximity effect (an exaggerated bass response).
- Angle: Adjusting the angle of the microphone can alter the tonal balance of the recording. For example, angling a microphone slightly off-axis can reduce sibilance (harsh “s” sounds) in vocals.
- Height: Experiment with microphone height to capture different aspects of the sound source. For example, raising a microphone above a guitar amplifier can capture a brighter, more articulate tone.
Use your ears and trust your instincts. There’s no one-size-fits-all solution, so experiment until you find the microphone position that sounds best.
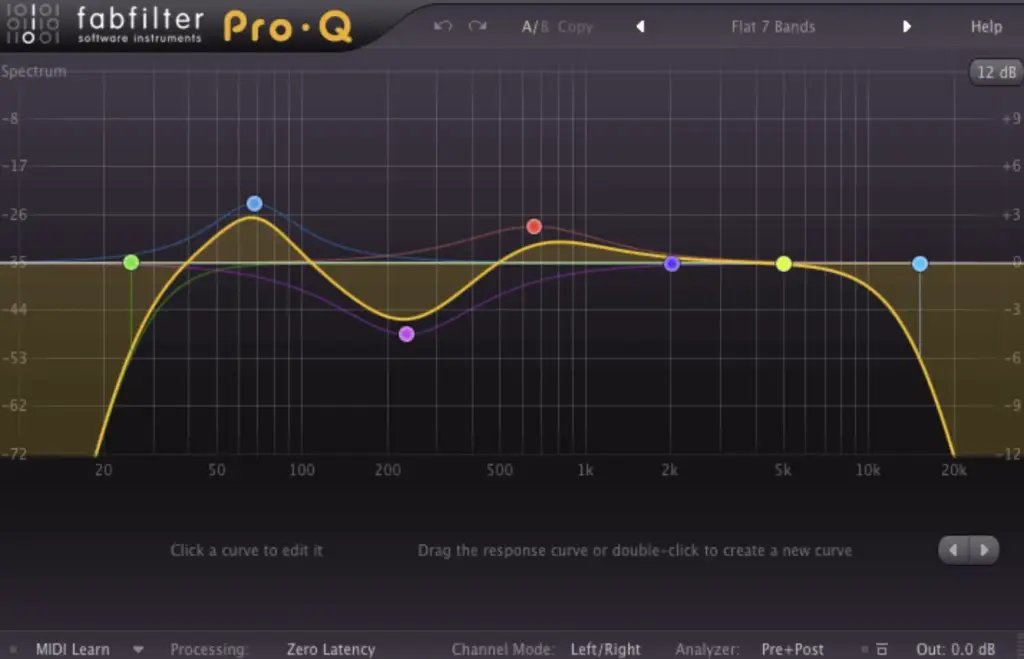
EQ Settings: Sculpting Your Sound
Equalization (EQ) is the process of adjusting the frequency content of an audio signal. It’s a powerful tool for shaping the sound of your recordings, enhancing clarity, and correcting tonal imbalances. However, it’s important to use EQ judiciously, as excessive EQ can introduce unwanted artifacts and degrade the overall sound quality.
Understanding Frequency Ranges
The audible frequency range is typically considered to be 20 Hz to 20 kHz. This range can be divided into several sub-ranges, each with its own sonic characteristics:
- Low Frequencies (20 Hz – 250 Hz): Bass frequencies, responsible for the fundamental tone of instruments and the overall sense of warmth and fullness.
- Mid Frequencies (250 Hz – 4 kHz): The most critical range for vocals and many instruments, containing the majority of the information that defines their character.
- High Frequencies (4 kHz – 20 kHz): Treble frequencies, responsible for clarity, detail, and airiness.
Understanding these frequency ranges is essential for making informed EQ decisions.
Common EQ Techniques
Here are some common EQ techniques used in DIY acoustic recording:
- High-Pass Filtering: Removing unwanted low-frequency rumble and noise. This is often the first step in EQing any track.
- Low-Shelf Filtering: Boosting or cutting low frequencies to add warmth or reduce muddiness.
- Peaking Filters: Boosting or cutting specific frequency ranges to enhance clarity, reduce harshness, or correct tonal imbalances.
- Notch Filtering: Attenuating narrow frequency ranges to remove unwanted resonances or feedback.
Each audio source requires a different approach. For example, a vocal track might benefit from a slight boost in the high frequencies to add clarity, while a bass guitar track might require a cut in the low-mid frequencies to reduce muddiness.
EQ Settings for Common Instruments and Vocals
While every recording situation is unique, here are some general EQ starting points for common instruments and vocals:
Vocals
- High-Pass Filter: 80 Hz – 120 Hz to remove low-frequency rumble.
- 2 kHz – 4 kHz: Slight boost to enhance clarity and presence.
- 5 kHz – 8 kHz: Cut to reduce sibilance (if necessary).
- 10 kHz – 12 kHz: Gentle boost to add airiness and sparkle.
Acoustic Guitar
- High-Pass Filter: 100 Hz – 150 Hz to remove low-frequency boominess.
- 250 Hz – 500 Hz: Cut to reduce muddiness.
- 2 kHz – 4 kHz: Boost to enhance clarity and articulation.
- 8 kHz – 10 kHz: Gentle boost to add sparkle and airiness.
Bass Guitar
- 40 Hz – 80 Hz: Boost to add low-end punch and power.
- 250 Hz – 500 Hz: Cut to reduce muddiness and improve clarity.
- 1 kHz – 2 kHz: Slight boost to enhance definition and articulation.
Drums
- Kick Drum: Boost around 60 Hz for low-end thump, and around 3 kHz – 5 kHz for attack.
- Snare Drum: Boost around 200 Hz – 300 Hz for body, and around 5 kHz – 7 kHz for snap.
- Overheads: High-pass filter around 200 Hz to remove low-frequency rumble, and boost high frequencies for clarity and sparkle.
Remember, these are just starting points. Always use your ears and adjust the EQ settings to suit the specific characteristics of your recordings.
IK Multimedia iRig Mic Studio: A DIY Recording Solution
For musicians and content creators looking for a versatile and portable recording solution, the IK Multimedia iRig Mic Studio stands out as a compelling option. This large-diaphragm digital condenser microphone offers exceptional sound quality and a range of features designed to simplify the recording process, making it an ideal tool for DIY acoustic recording.
The iRig Mic Studio delivers professional-grade audio capture in a compact and user-friendly package. It’s compatible with a wide range of devices, including iPhones, iPads, Android devices, and computers, making it a flexible choice for recording on the go or in a home studio setting.
Key Features of the iRig Mic Studio
- Large-Diaphragm Condenser Capsule: The iRig Mic Studio features a high-quality condenser capsule that captures a wide frequency range with exceptional detail and clarity. This ensures that your recordings sound rich, full, and professional.
- 24-bit/48kHz Resolution: This microphone supports high-resolution audio recording, capturing every nuance of your performance with pristine accuracy.
- Built-in Preamp: The integrated preamp provides ample gain for recording a variety of sound sources, from vocals to acoustic instruments.
- Headphone Output with Direct Monitoring: The built-in headphone output allows you to monitor your recordings in real-time with zero latency, ensuring accurate and precise performance.
- Gain Control and LED Metering: The intuitive gain control and LED metering system make it easy to set the optimal recording level, preventing clipping and distortion.
- Multiple Polar Patterns: The iRig Mic Studio offers selectable cardioid and omnidirectional polar patterns, providing flexibility for different recording scenarios.
- Portable and Durable Design: The compact and rugged design makes the iRig Mic Studio ideal for recording on the go.
The iRig Mic Studio’s features are thoughtfully designed to provide users with a powerful and versatile recording tool that simplifies the DIY recording process.
Advantages, Benefits, and Real-World Value
The iRig Mic Studio offers a range of advantages and benefits for DIY acoustic recording enthusiasts:
- Professional Sound Quality: Delivers high-quality audio capture that rivals professional studio microphones.
- Versatility: Compatible with a wide range of devices and recording scenarios.
- Portability: Compact and lightweight design makes it easy to record on the go.
- Ease of Use: Intuitive controls and simple setup make it accessible to beginners and experienced users alike.
- Real-Time Monitoring: Zero-latency headphone monitoring ensures accurate and precise performance.
- Cost-Effectiveness: Offers excellent value for its price, providing professional-grade features at an affordable price point.
Users consistently report that the iRig Mic Studio delivers exceptional sound quality and ease of use, making it an ideal tool for creating professional-sounding recordings in a DIY setting. Its portability and versatility make it a valuable asset for musicians, podcasters, and content creators who need a reliable recording solution on the go.
A Comprehensive Review of the iRig Mic Studio
The IK Multimedia iRig Mic Studio is a well-regarded microphone in the DIY recording community, known for its combination of portability, versatility, and surprisingly good sound quality for its price point. It aims to provide a user-friendly experience for musicians, podcasters, and voice-over artists looking to improve their audio quality without breaking the bank.
User Experience & Usability
Setting up the iRig Mic Studio is straightforward. It connects easily to computers and mobile devices via USB, and the included software (or compatible DAWs) recognizes it immediately. The gain control and LED metering provide visual feedback to ensure optimal recording levels, which is particularly helpful for beginners. The direct monitoring feature is a huge plus, allowing you to hear yourself in real-time without latency, making for a much smoother recording process.
Performance & Effectiveness
The microphone delivers a clear and detailed sound, especially for vocals and acoustic instruments. While it might not compete with high-end studio microphones, it performs admirably for its price range. The cardioid polar pattern effectively rejects background noise, making it suitable for recording in less-than-ideal acoustic environments. The omnidirectional pattern is useful for capturing room ambience or recording multiple sound sources simultaneously.
Pros:
- Excellent Portability: Its compact size and lightweight design make it easy to take anywhere.
- Versatile Compatibility: Works seamlessly with computers, iOS, and Android devices.
- Good Sound Quality for the Price: Delivers clear and detailed recordings, especially for vocals and acoustic instruments.
- Direct Monitoring: Allows for latency-free monitoring, ensuring accurate and precise performance.
- User-Friendly Design: Intuitive controls and simple setup make it easy to use for beginners.
Cons/Limitations:
- Plastic Construction: The plastic housing feels somewhat less durable than metal alternatives.
- Requires Additional Software: While it comes with some bundled software, you’ll likely need a DAW for more advanced editing and mixing.
- Not a Replacement for High-End Studio Mics: While good for its price, it doesn’t match the performance of professional-grade microphones.
- Can Be Sensitive to Plosives: A pop filter is recommended to avoid unwanted popping sounds when recording vocals.
Ideal User Profile
The iRig Mic Studio is best suited for:
- Beginner to intermediate musicians: Looking for an affordable and portable way to record demos or practice sessions.
- Podcasters and voice-over artists: Who need a simple and reliable microphone for recording clear and professional-sounding audio.
- Mobile content creators: Who need a versatile microphone for recording on the go.
Key Alternatives
Two popular alternatives to the iRig Mic Studio are the Blue Yeti and the Rode NT-USB Mini. The Blue Yeti offers multiple polar patterns and a built-in headphone amplifier, while the Rode NT-USB Mini is known for its compact design and exceptional sound quality.
Expert Overall Verdict & Recommendation
The IK Multimedia iRig Mic Studio is a solid choice for DIY acoustic recording enthusiasts who are looking for a portable, versatile, and affordable microphone. While it has some limitations, its combination of features and performance make it a worthwhile investment for beginners and intermediate users. We recommend it for anyone who needs a reliable and easy-to-use microphone for recording vocals, acoustic instruments, podcasts, or voice-overs on the go.
Perfecting Your Sound: Final Thoughts
Mastering diy acoustic recording tips eq settings is an ongoing journey that requires experimentation, patience, and a keen ear. By understanding the fundamentals of room acoustics, microphone placement, and equalization, you can transform your home studio into a powerful creative tool. Remember to trust your ears, experiment with different techniques, and don’t be afraid to break the rules. The most important thing is to create recordings that sound great and capture your unique artistic vision.
Now that you’re armed with these essential tips and techniques, we encourage you to experiment and refine your skills. Share your experiences with DIY acoustic recording in the comments below. What are your favorite tips and tricks? What challenges have you faced, and how did you overcome them?
